


Thursday, June 5, 2008
Qtopia on Rokr E6 with bad colours
Here is a test of the latest version of Qtopia(4.3.0),which works on E6,but with little errors in colours.
Install OpenMoko or Qtopia in Rokr E6 or A1200
Download the text file Here
INSTALLATION INSTRUCTIONS FOR QTOPIA AND OPENMOKO ONTO A1200 or Rokr E6
Here is a Step-By-Step Guide on Installing OpenMoko or Qtopia in A1200 or E6
Requirements:
1. A Linux PC
2. OpenMoko image (or)Qtopia Image
3. A Kernel Image to Boot With Get the suitable one for ur phone here.
4. And Ofcourse an A1200 or E6.
Step 1: Prepare your SD card for the installation.
Connect your phone via Mass Storage Mode.
1. Open Terminal(Applications>>Terminal incase of Ubuntu Live Session).
2. Type in 'fdisk /dev/sda'
d
n
p
1
+300M(or any size)
n
p
2
w
3. Now you have created the partition table,now lets format the memory card.
Type in
sudo mkdosfs /dev/sda1
sudo mke2fs /dev/sda2
when it says that the partition is mounted, unmount the partition by giving sudo umount /dev/sda2(or sda1)
Step 2: Extract the image onto the card.
1. type in at the Terminal,
sudo mount -t ext2 /dev/sda2 /mnt
cd /mnt
sudo tar jxvpf (path to the image of qtopia or openmoko) [sudo tar jxvpf ~/Desktop/Qtopia-4.3.0-snapshot-25102007 -2.6.23-1-r1-a780.tar.bz2 in my case].
sync(wait till it finishes)
cd /
sudo umount /mnt
Note:for extraction of images,there are various file formats of images(.tar,.tar.bz2,.tar.gz,etc.,you are required to use those specified commands to extract the images.
for eg, we use sudo tar jxvpf (path to image) for tar.bz2 files.
If you are using tar.gz files, use sudo tar -jxvf (path to image)
Remove the connection from the PC.
Step 3: Kernel Booting
We have completed almost 90% of the installation process, we are now to pass the kernel to the phone's RAM and boot with the given kernel.
1. Download ezx-boot-usb
2. Open Terminal window and switch to the path of the downloaded ezx-boot-usb using cd command(cd ~/Desktop/Downloads incase of mine).
3. Type in the following
sudo chmod +x ezx-boot-usb
4. Now this is the last command where we are passing the kernel to the ram of the phone,so we need to switch the phone into bootloader mode.
To switch the phone into bootloader mode,
For A1200, hold down the Camera Key + Voice Recog. Key + Power On the phone.
For E6, Hold down the Camera Key + Power On the phone.
Now you will get a Red colored screen on phone.
5. Connect your Phone thru the USB cable and type in at the Terminal as
sudo ./ezx-boot-usb (path to the kernel image) [sudo ./ezx-boot-usb ~/Desktop/images/zImage-2.6.24.1-ezxWM-20080217-e6 in my case]
6. Now you will see some random text shown in Terminal,this is nothing but it is transferring the image to the RAM of the phone.
7. When this finishes, you can see that your phone displays some funny colors and starts booting Linux!
8. Relax Back and see your phone running OpenMoko or Qtopia.
Cheers!!
S Kiran Subramaniam
Tuesday, March 25, 2008
APP: FingerPad New SMS Keyboard
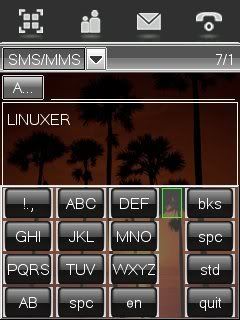
Installation Instructions:
Requirements:
Your Phone must be capable of running startup scripts.
Google the support files for running startup scripts.
Unzip fp.zip and main.zip in /mmc/mmca1
Put startup1.txt in /mmc/mmca1.
Reboot the phone.
After this, fingerpad will run. I recommend remove startup1.txt with samba and put startup.txt in /mmc/mmca1.
Bugs:
USB mass storage not work.
Browser run with problems.
Tested on 24xps(24xp30) and 59xpV2.
Download:
Startup1.txt
Startup.txt
fp.zip
main.zip
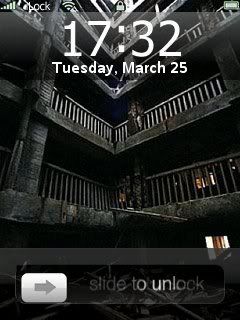
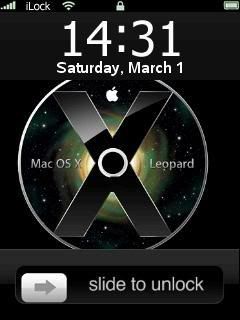
New qeilock with changeable wallpaper
Here is a new version of qeilock, where you can change the wallpaper of the qeilock on phone itself.
Download Here
Get the instructions to install from the last thread(the thread below). after installing follow the following instructions.
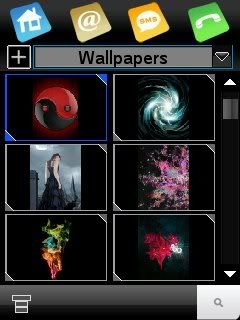
Step 1: Open the file you want to set as wallpaper for iLock.
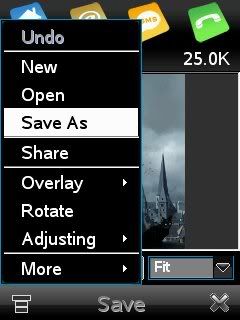
Step 2: Select Options >> Edit
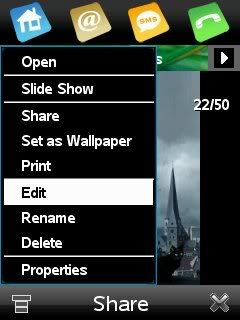
Step 3: Select Options >> Save As
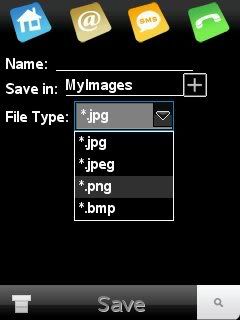
Step 4: Select Save As type as *.png
Step 5: Select the Save As Folder as mmc/qeilock/res
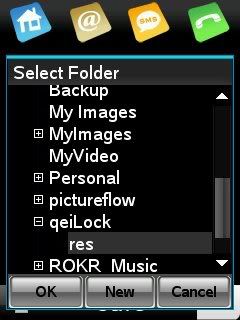
Step 6: Select Save
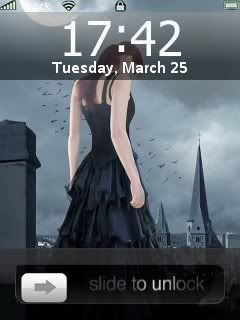
And the final Result is
Download Here
Get the instructions to install from the last thread(the thread below). after installing follow the following instructions.
Step 1: Open the file you want to set as wallpaper for iLock.
Step 2: Select Options >> Edit
Step 3: Select Options >> Save As
Step 4: Select Save As type as *.png
Step 5: Select the Save As Folder as mmc/qeilock/res
Step 6: Select Save
And the final Result is
Saturday, March 1, 2008
New qeiLock for A1200/E6
Download it Here
Instructions:
1. Copy the qeiLock Folder to Memory Card.
2. Copy the lines in the How To.txt file provided to CardRegistry present at mmc/.system/java/CardRegistry.(open it using Notepad and add these lines)
3. Disconnect your phone.
You are done with...
Enjoy.......
Subscribe to:
Posts (Atom)